Saturday, November 9, 2013

Endor

I've been working on this environment from Return of the Jedi with my friend Dustin, basically sticking to Ralph McQuarrie's concepts for the original film back ion the 80's. We're doing a location for a fighting game, so a lot of attention will be given to some main pieces in the environment. Dustin has been working on the AT-AT and I've got the imperial shuttle.


Started by blocking out the most intesresting shapes on the scene/
 

 Been working on the details around the back and on the wing, trying to get good geometry for baking the closest to concepts as possible/

Friday, August 23, 2013

Beyond Earth

So we finally finished this first version of Beyond Earth. The levels need a better color pattern and better textures. My next step will be to make a new level that combines the best elements of this game. The textures also need some more work to stand out, but this alpha actually helped us see a lot of the direction we want to take the game in. This has been my first experience in art directing, and the first time I wasn't involved in level design, just lead environment art. This video shows part of the walkthrough.

De Magnete (2010)

It's been a few years years since me and my friends in Brazil finished this demo, but I still think it looks cool. De Magnete is a 1st person puzzle game where we got to create all sorts of fun puzzles with magnets. We took 6 months of research and design, and 4 of production. It won second prize for best indie game in SBGAMES game festival in Brazil 2011. I worked level design and environment art for this, and it was the biggest project I had been on. Learned a lot from this, as the entire team was relatively new to the Unity Engine at the time.

Operation: Butterfly Effect - WIP


Hi! So I haven't posted in a while, this is the Butterfly Effect. A platformer for the young audiences about a secret agent squirrel that's trying to save his buddies around different worlds.  This game was for an ESA Indie Game competition and we got to this point practically in 4 months. We're still implementing the gameplay and polishing some key areas. This was my first game using UDK.


 I blocked this level out trying to get a good flow on paper, and later in 3D to take advantage of vistas where the player can see other parts of the level in the background. After the team approved my level design I went on to creating the textures with Aaron, and modelling the pieces to actually build the level over the blockout. Steven had the great idea to add the background buildings, water, and door torches. More details of the game development process on the game's blog http://www.cloudgamestudios.com/#!blog/c1z86

Sunday, June 2, 2013

Creating a Master Material

This week I focused on the master material and unwrapping our structural meshes to use it.
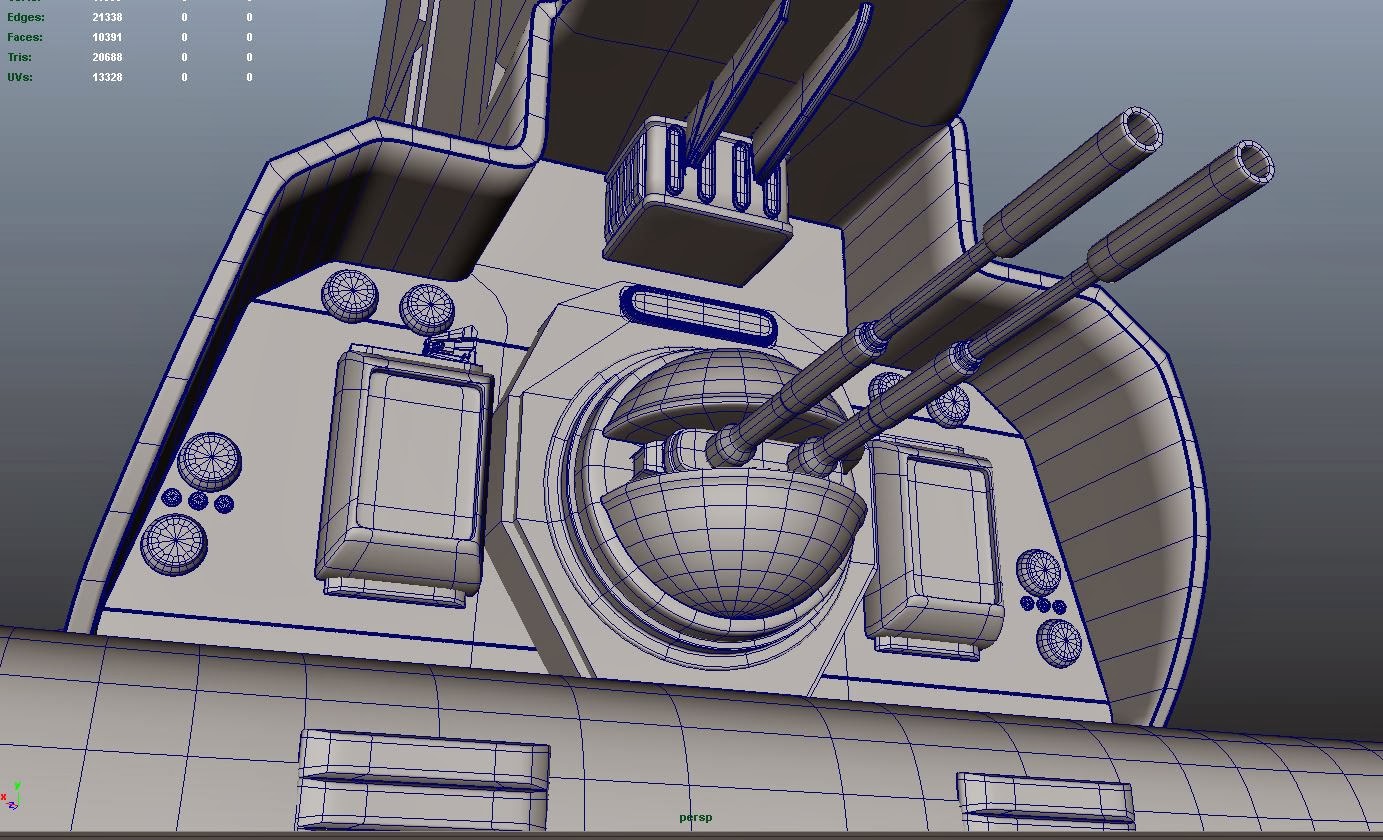
First I modeled some details I thought would look interesting for trims and panels for our structures, and baked some maps for the material and to help texturing.
Hi-res model

Ambient-Occlusion/Specular/Normal/Diffuse
For the material I set up some basic instructions for control in the material instances. One of the most important parts of the setup was giving the level designers freedom for changing the material according to the environments it's being used in. So the colors have parameters where the level designer can simply use a color picker to change their values easily in the editor.

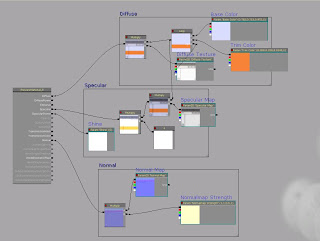
To add some possibility for variation I hid a simple mask in the Alpha channel for the diffuse to serve as a different trim color in the material. These colors are mainly for visually labeling different areas and levels in the lunar facility. Following some other artist's examples I initially was using an 'ADD' node to add the trim color over the material but this proved to wash out the color for the trim, so the best solution was actually using a linear interpolate node using the mask to pick what color the material multiplies on each part of the texture. This way the colors all multiplied evenly over the diffuse giving a better look.

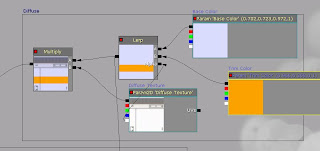
Lerp between the two colors
So when the designers apply this material to their assets they can pick different colors for separate parts of it.


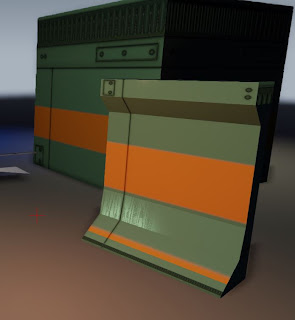
Applied to different assets the material gives many color possibilities
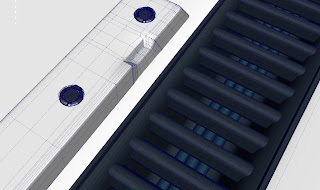
Here are some assets and how they use the texture. I gave the other artists a version of the texture with a semi-visible line showing where the different trim color may go, to make it easier when unwrapping their assets.

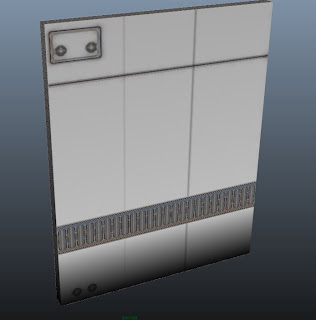
Semi-visible lines in the middle show where the color can be changed

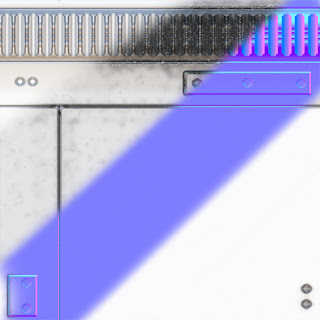
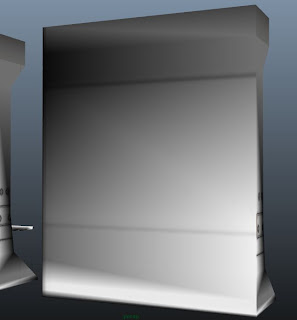
Wall piece unwrapped with the trim on the back so it can be used as a different type of wall

Tuesday, May 21, 2013

Modeling Update

This week I've finished the set pieces for the external bridge, and started on the elevator.  They fit together but there is also a column piece to hide the seams.


Example of set piece configuration for level designers

Bridge pieces

Variation with glass to look out the moon surface

Elevator shaft
 I started working on a plastic cover for seams on the cargobay, the shape is still chunky, an it's a bit tricky to get the plastic really looking like plastic. It needs more details to look right.

Diffuse/Normal
 Staircase for scenes


Tuesday, May 14, 2013

Creating a Lunar Base

This week I've been working on making the outer facility, We might not use these again, just for the first scene. But there will be a nice view to look at when the layer goes down the glass elevator. I think the watch towers are a pretty good addition, loosely inspired by Oblivion (:
Inspiration for high towers

Overview
Watch Tower
Watch towers' perspective

Bridge to enter the facility


Also finally made a window piece for the hallways, and a smaller floor corner piece. As requested by the level designers.